how do you engraving a photo picture by fiber laser engraving machine?
fiber laser engraving machine can engraving photo picture on metal products, photo picture belong to bitmap file, like *jpg *bmp, *jpeg *gif format, pls be sure that you need You need to prepare a high-resolution, as well as high-contrast photo, then you can go next step.
before start it, you need to know the meaning of each button in ezcad software.
first step, you need import a photo, users may select in the draw menu or click icon  in the toolbar
Then the system will pop a dialog box as Figure 4-51 shows to open a graphic file.
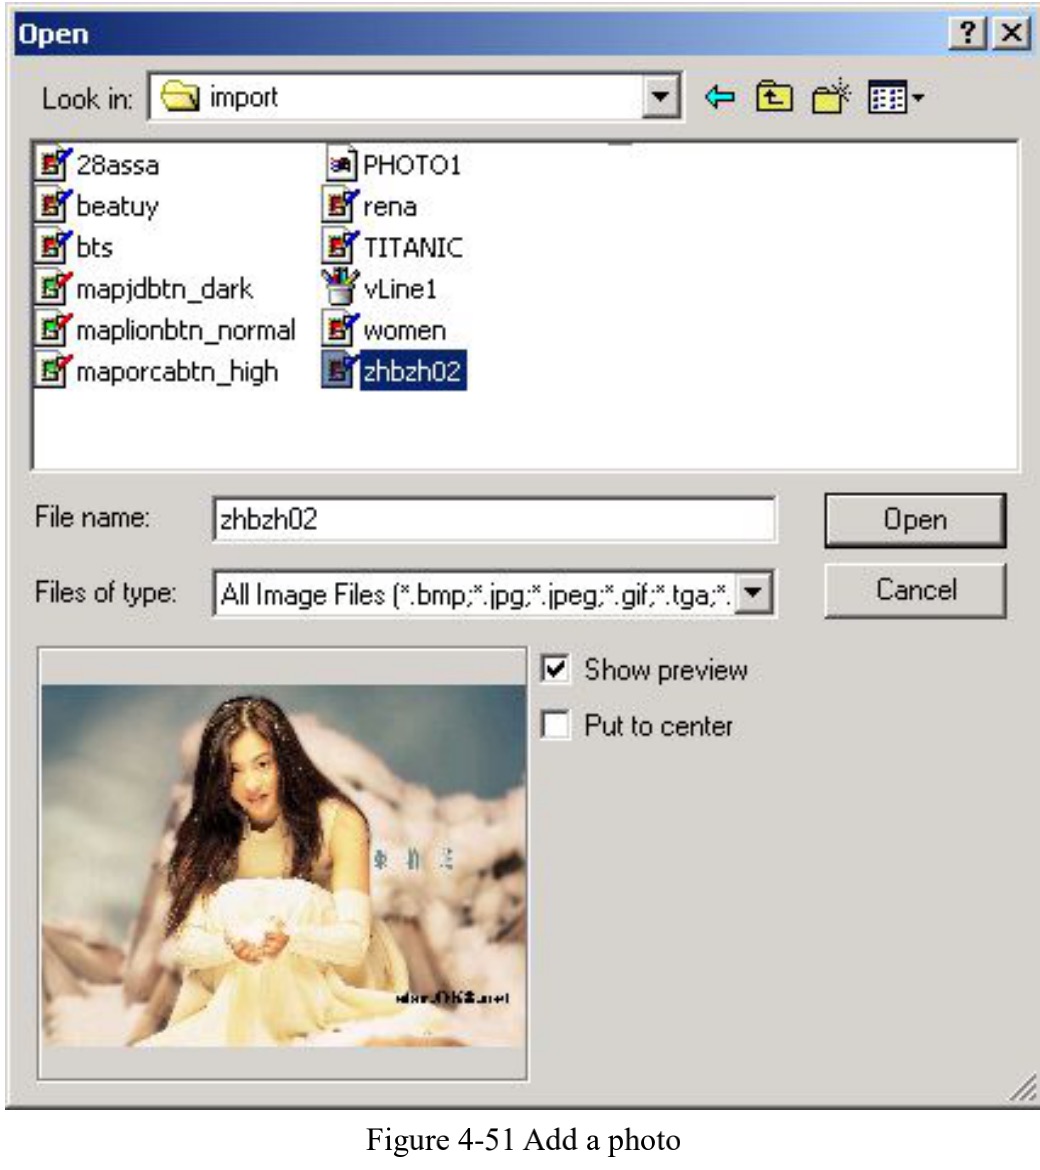
The current supported graphic file formats are: Bmp;Jpeg, Jpg;Gif;Tga;Png;Tiff, Tif;
Show Preview: When users select a graphic file, there will be a preview displayed in the dialog box.
Put to center: put the photo’s center in the origin
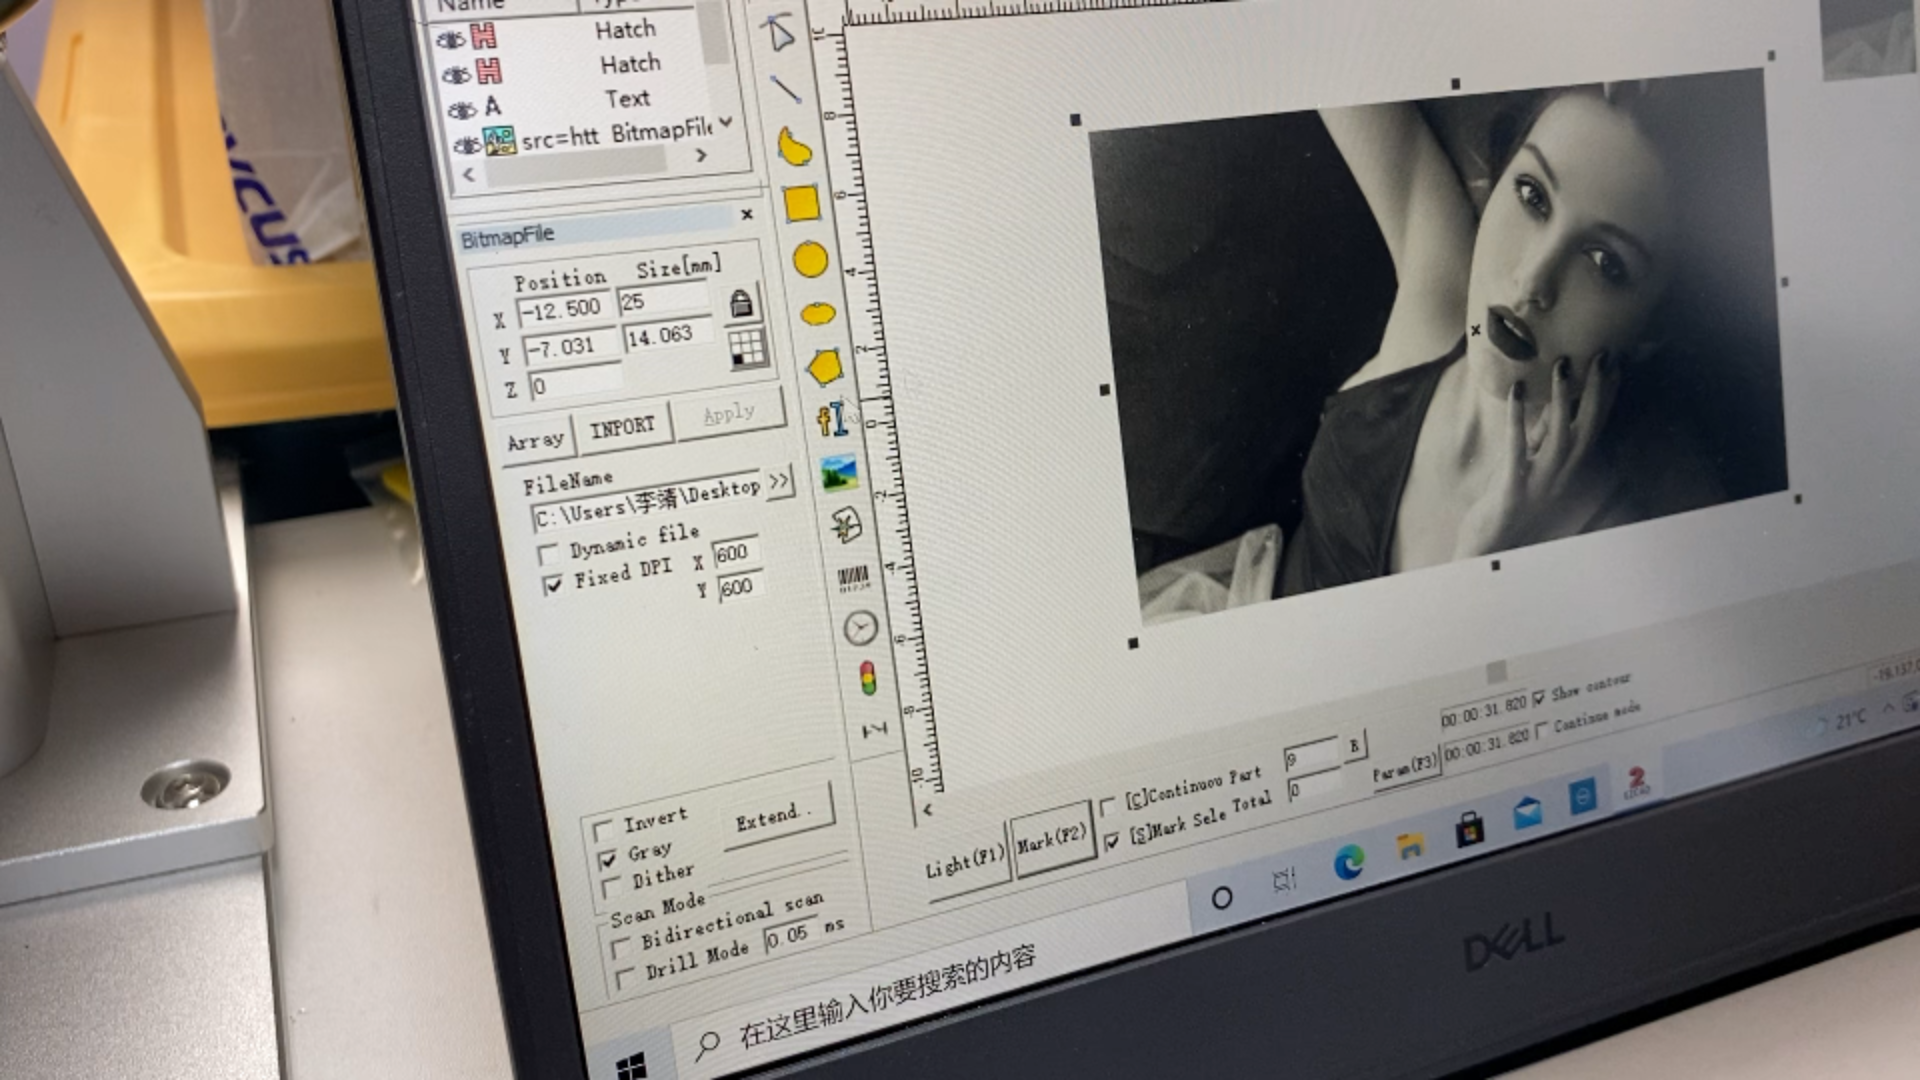
When finishing adding a photo, a “Bitmap” parameter setting will appear in the Property toolbar as Figure 4-52 shows.
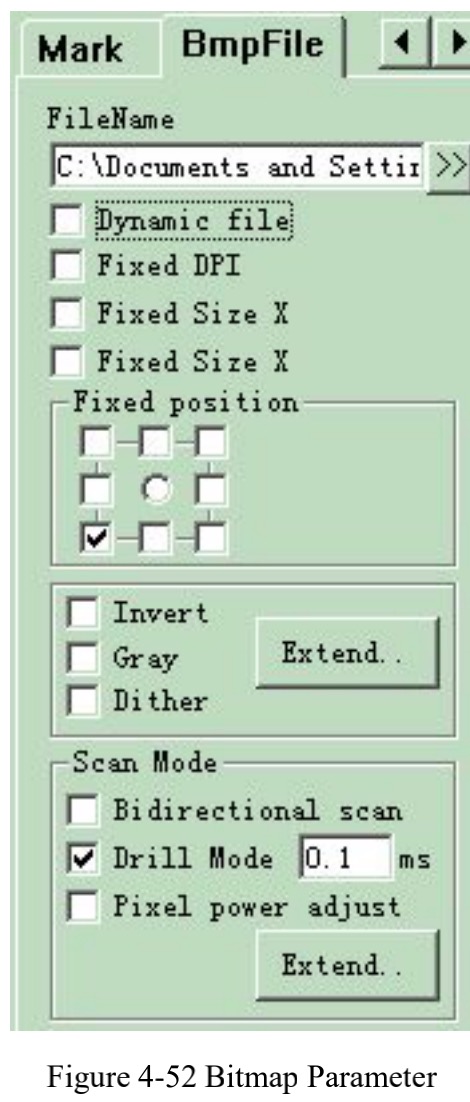
Dynamic file: whether to reread files when in process.
Fixed DPI: When selected, the system will fasten the unfixed DPI of dynamic photo. The higher the DPI’s level is, the closer the dots gather; and the photo’s precision is better, then the marking time is longer.
DPI: dot per inch; 1 inch is about 25.4 millimeters
Fixed Size X: When checked, the width of the dynamic photo will be preserved in an appointed size, and if unchecked, the photo’s width will be the original size of the photo.
Fixed Size Y: When checked, the height of the dynamic photo will be preserved in an appointed size, and if unchecked, the photo’s height will be the original size of the photo.
Fixed position: the benchmark the dynamic photo based on while in size changing Image Manipulation:
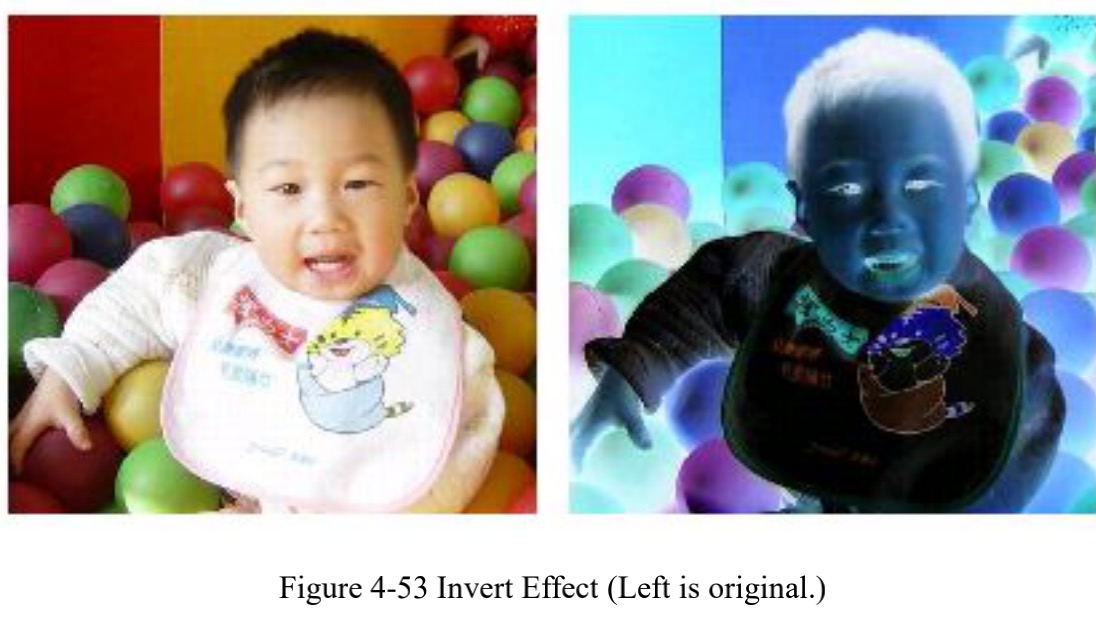
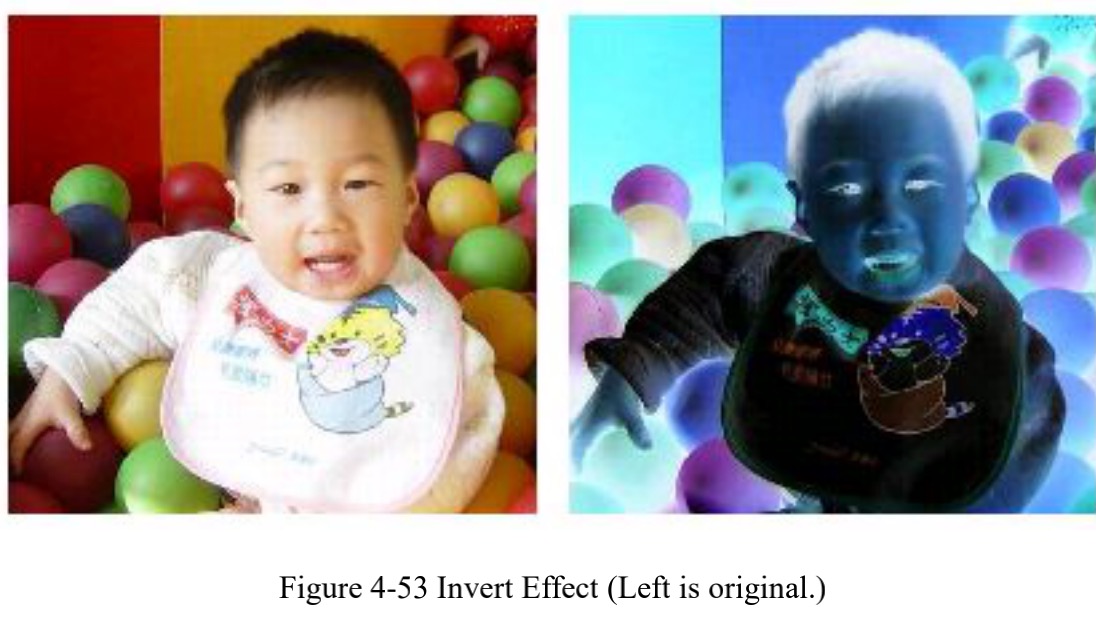
Invert: run negative effect on photos (figure 4-53)
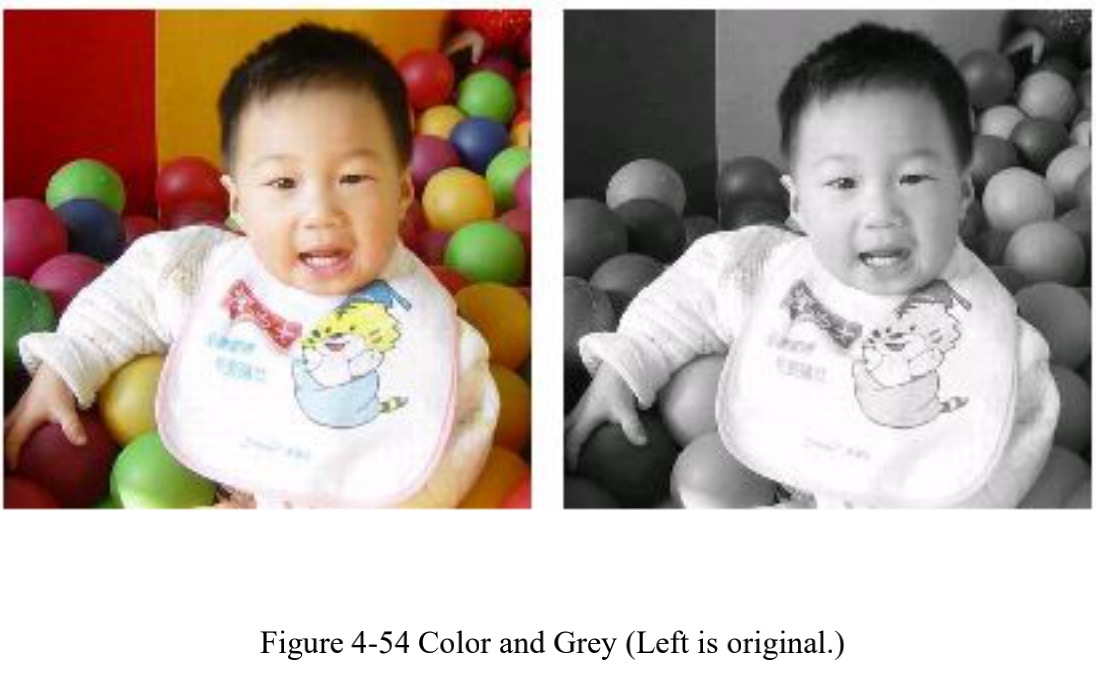
Gray: change color photos into grey of level 256
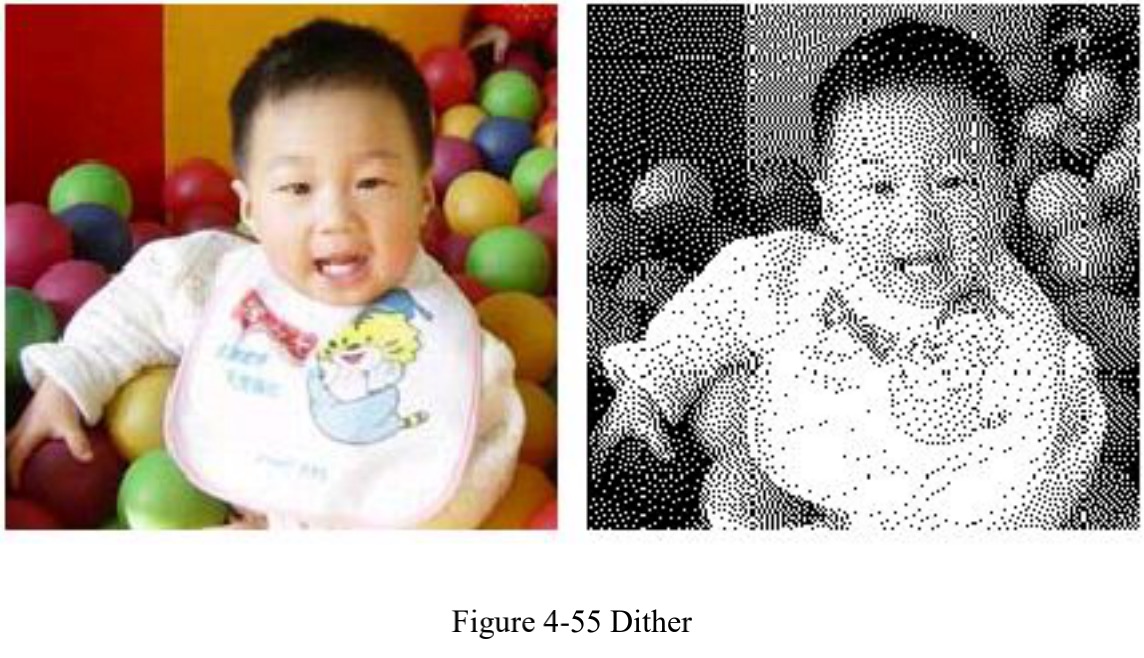
Dither: This effect is similar with the function “Grey Adjust” in Adobe PhotoShop. It uses color black and white to simulate grey image, so as to achieve a grey effect with dots arranged in different densities, as Figure 4-55 shows. (The white bar in the photo was caused by display, which will not be marked.)
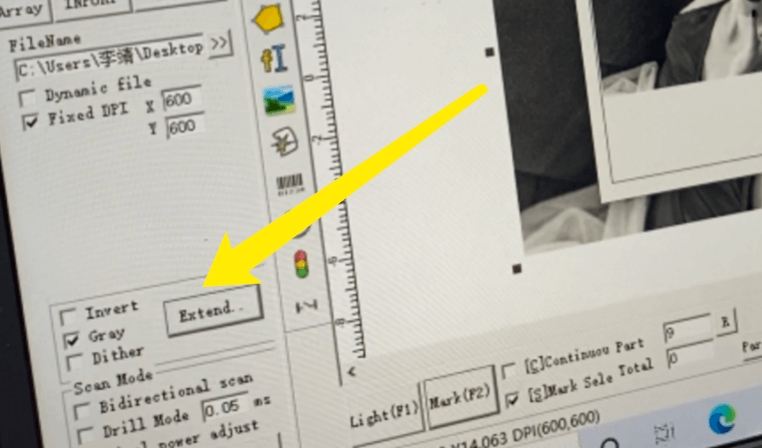
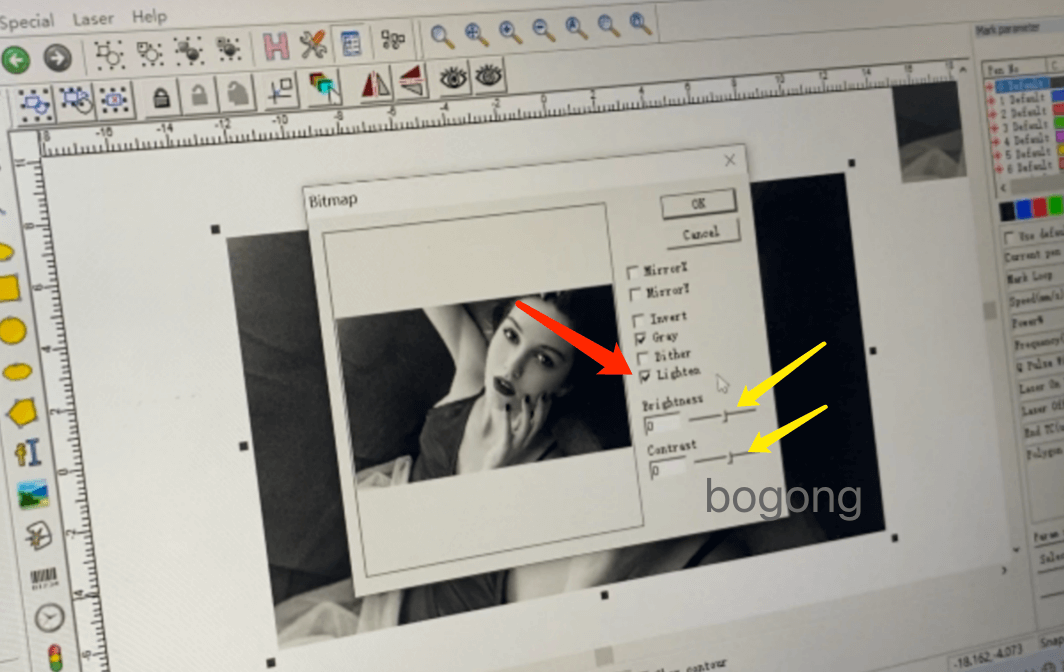
Click the “Expand” button to run the “Bitmap” dialog box. (Figure 4-56)
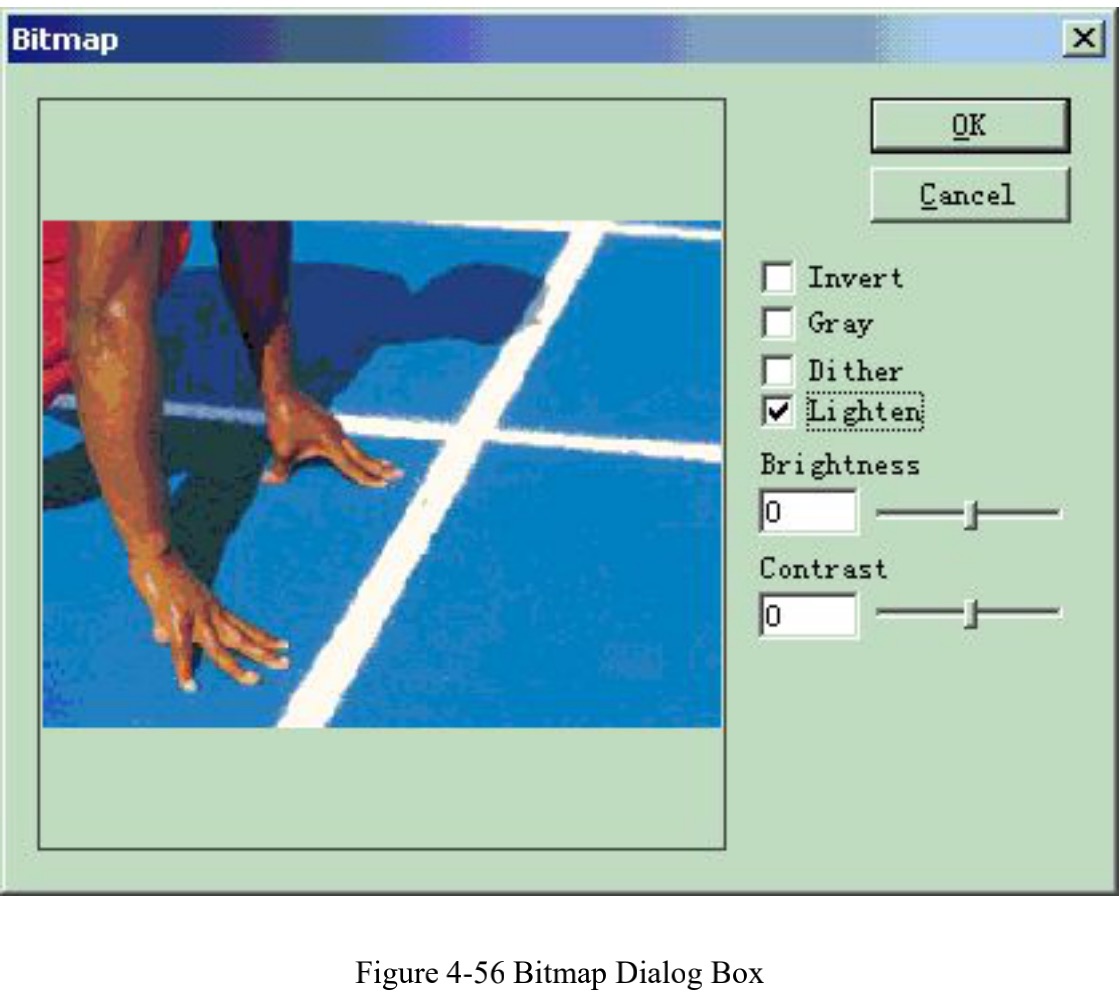
Lighten: adjust the current image's brightness and contrast values.
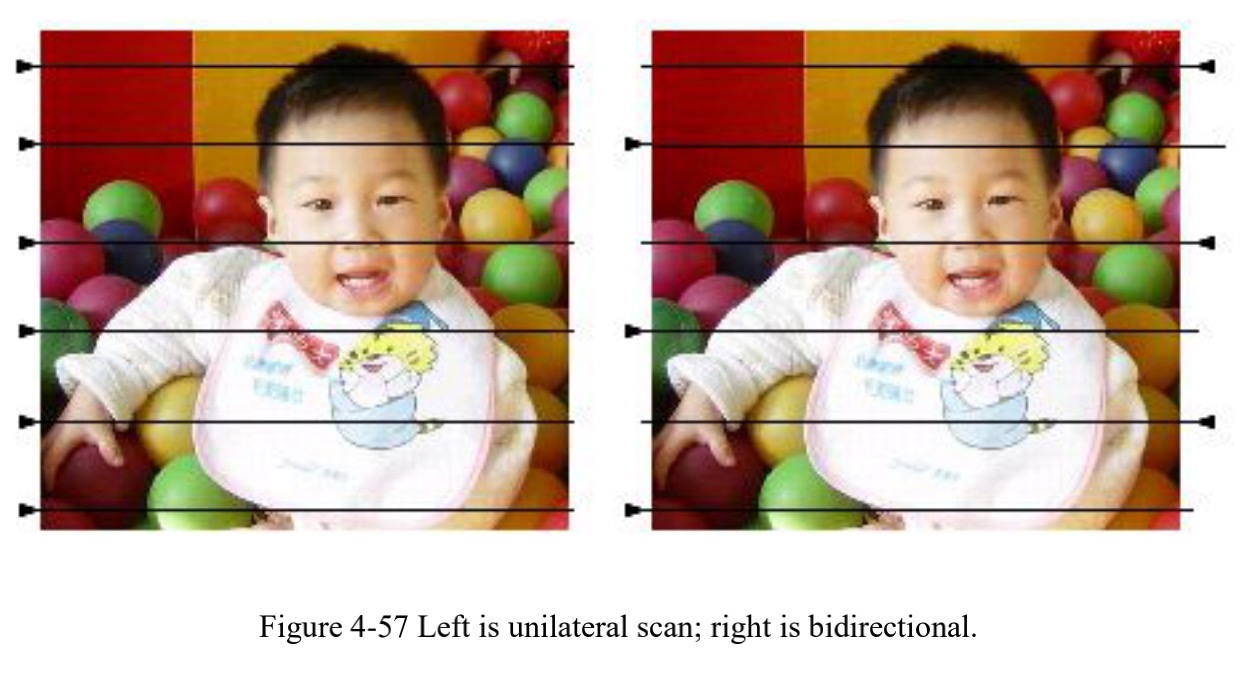
Scan Mode: Bidirectional Scan: the scan mode is bidirectional when in marking process (Figure 4-57)
Mark Mode: Drill mode: whether the laser is kept on or restricted in appointed time for each dot’s marking when in process
Adjust Power: whether the laser’s power is adjusted according to each dot’s grey level when in process Expand Parameter: Figure 4-58
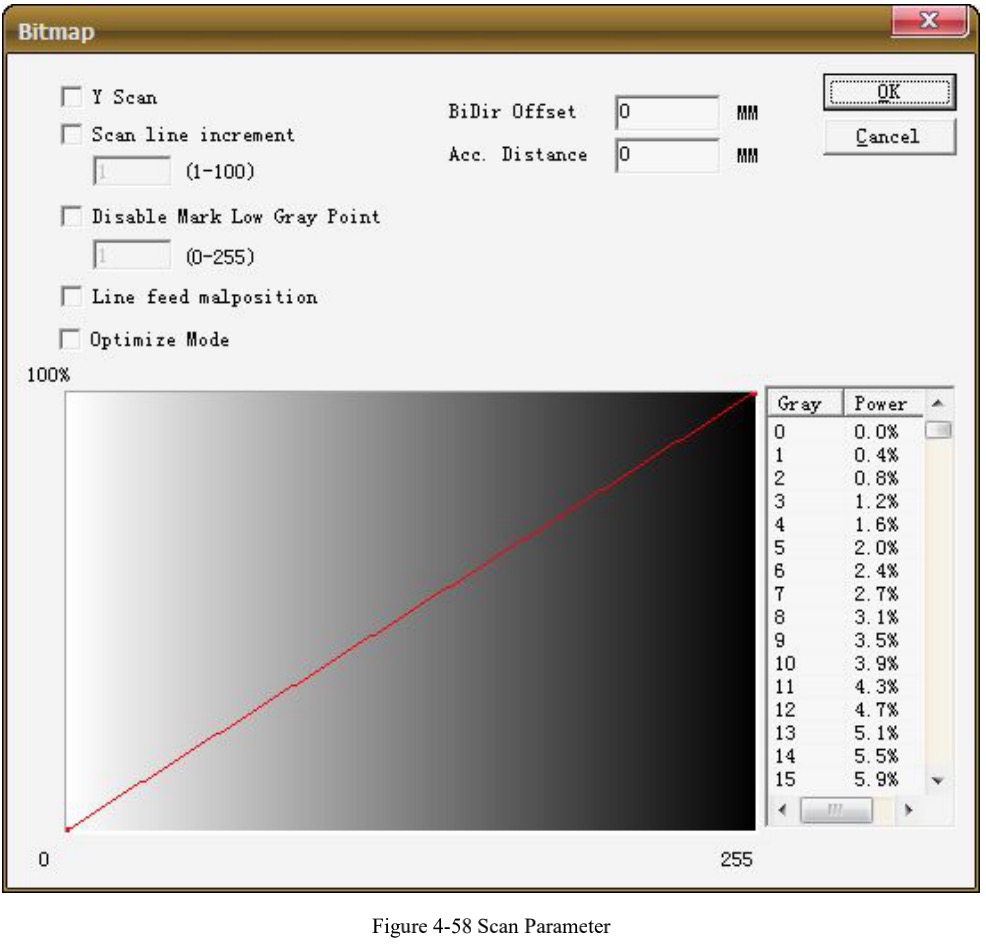
Y Scan: The scan will run along Y axis line by line.
Scan line Increment: This item indicates whether to scan line by line or skip some lines. This function may quicken the marking speed when in low precision marking requirement.
Disable Mark Low Gray Point: This item indicates that every point is marked or only marking bigger gray points. This function may quicken the marking speed when in low precision marking requirement. Line feed malposition: The point isn’t aligned between two adjacent rows, but the point is aligned with the position which is the middle of two points in the previous line, to avoid the trace of marking.
Gray-Power figure: For improving marking results, can modify some of the gray scale corresponds to the power
Optimize Mode: calculate the marking speed according to the DPI and frequency to optimize marking speed and result
BiDir Offset: improve the edge not alignment marking problem
ACC.Distance:this parameter is used for remove the offset of BiDir scan model
hope you can read above information, because it's hard to start engraving photo without above knowledge, now we will show you how to engraving one photo by eacad step by step:
note: because below picture is that bogong tested on silver, so first step we need engraving silver sheet to white color first.
we will not guide you about white color engraving. we will only show next step,
first step: imput an bitmap file (jpg or jpeg format ), put the picture in the center, then set size and choose "grey"
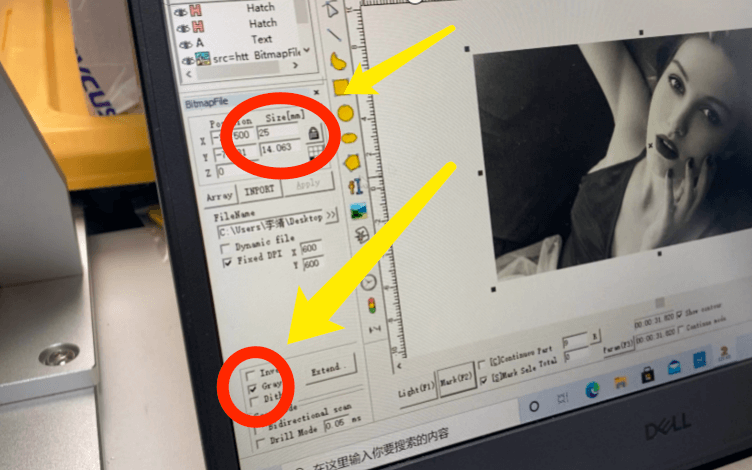
now we need click "pixel power adjust", then click button "power map"
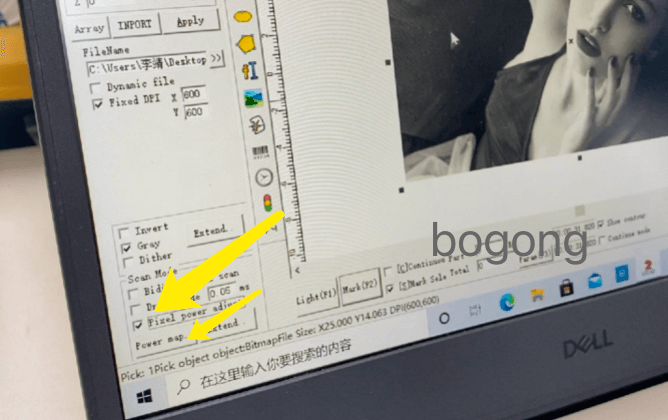
after click power map, you will see that each grayscale value will correspond to a different power
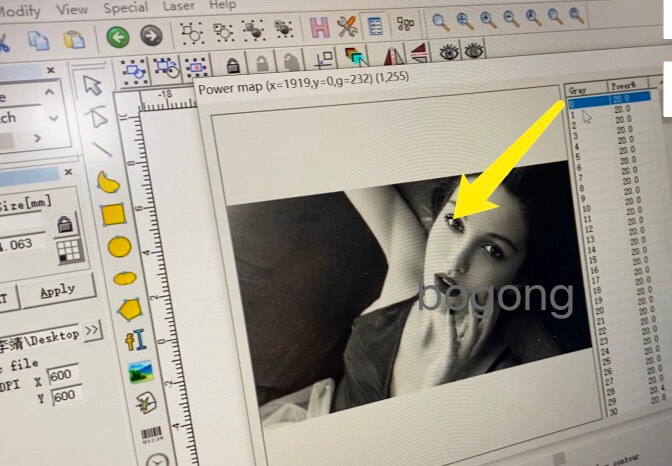
You will see from above picture, each grayscale value will correspond to a different power. If the gray value is 0, it corresponds to the whitest part of the picture, you can set the power to 0%, but if this is the case, that is, the white part is basically no laser engraving. In general, we will set the laser power to 5-20% when the gray value is 0. sure that depending on the actual picture.
you can also set the grey value 255 below:
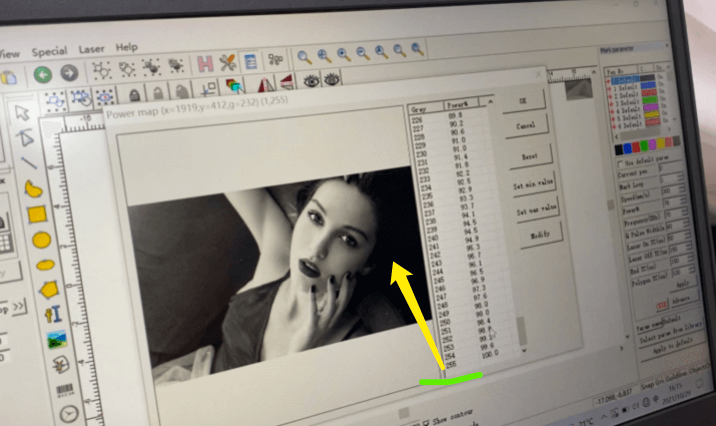
If the gray value is 255, then corresponding to the blackest part of the picture, it usually corresponds to 100% of the power, you can also change this value to a smaller one, then the blackest part will not be too laser scorched.
you can see from below picture, You can take a look at the pictures with yellow arrows below, they all have the problem that the gray value power is too small, so the faces are very white, making the pictures look less beautiful
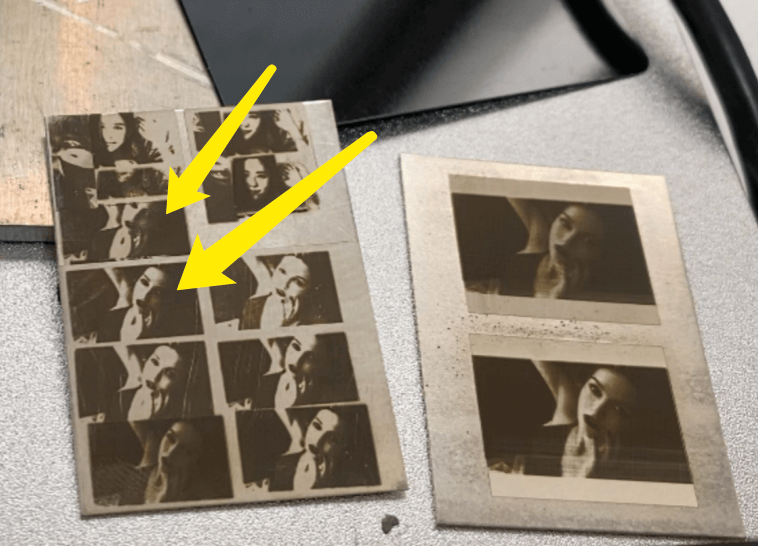
sometimes we need adjust the picture to get better engraving result, like we can adjust the bright and image Contrast.
you can click below button to ajust bright of picture and etc.
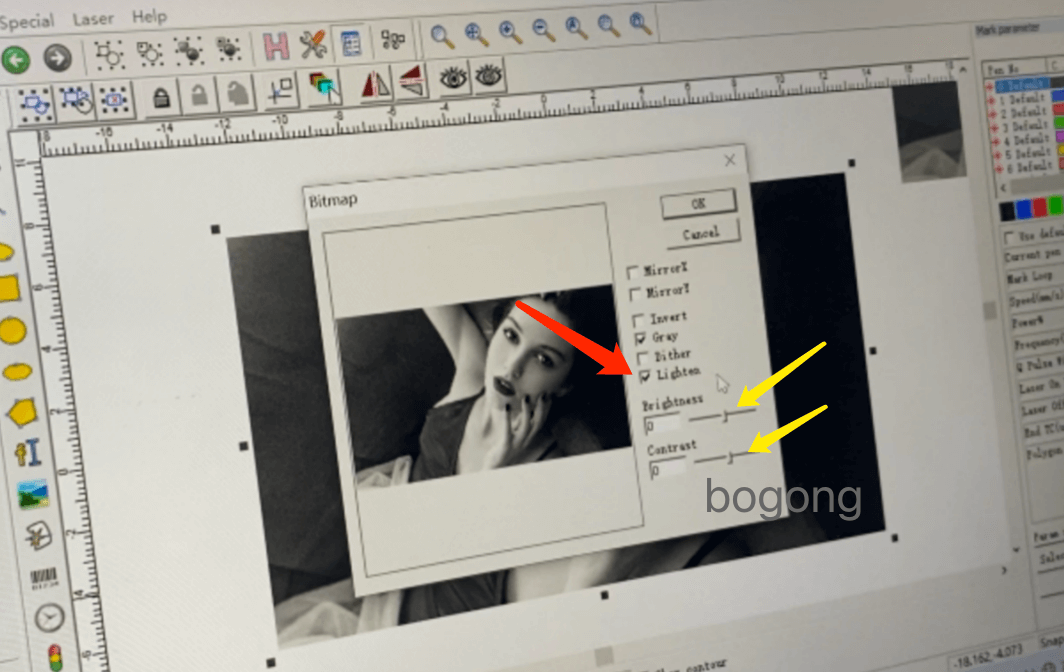
You can look at the effect after adjusting the brightness and contrast
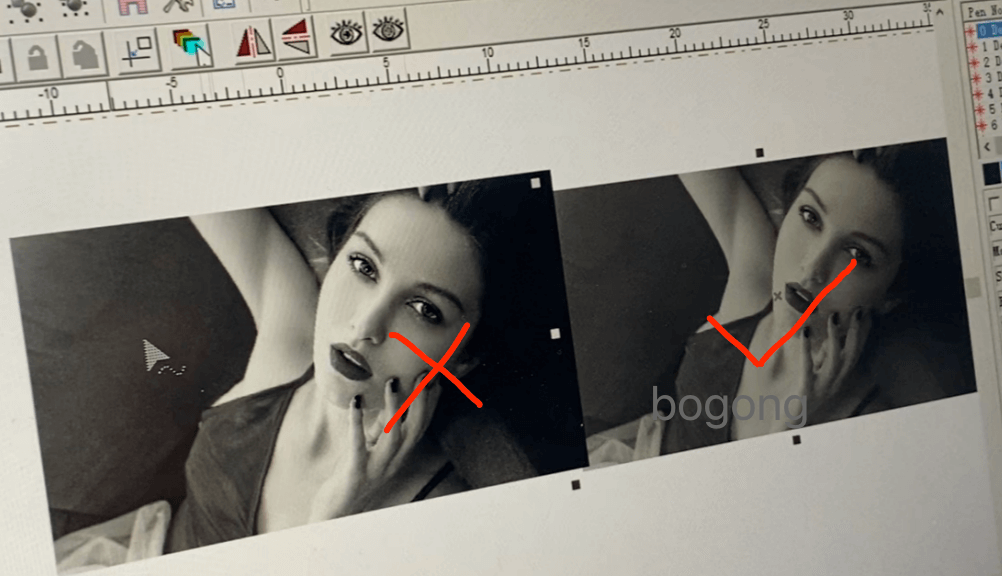
you can see the result of engraving below:
 click
click
